
Updated: 27-Jun-2025
The gauges installed in Cabriolets allow for easy monitoring of the engine's oil temperature, oil pressure, electrical system, and coolant temperature. While these gauges are not 100% accurate 100% of the time, they help keep the driver from being surprised by a change in engine performance. The gauges show changes in engine condition before the condition reaches a critical status. While the gauges will alert you to changes in engine performance, they will do you no good unless you understand what they are telling you.
Console Gauges
Volt Gauge

- Displays condition of charging system.
- Normal range is 13 to 14 volts with slight dip to 12 when accessories are on/running and at start-up.
- A voltage reading of 15.5+ means the alternator is overcharging the system. Causes: faulty voltage regulator and/or weak battery.
- A voltage reading of less than 12 with all accessories running usually means that the alternator is not charging. Causes: loose/slipped belt and/or faulty voltage regulator.
- Be sure to use a volt-ohm meter on the battery and/or alternator to verify what the car's gauge is reading.
- Part #321-919-531A
Bar Gauge

- Displays oil pressure.
- Minimum of 2 bar at 2000 rpm and engine oil temperature at 80°C (2 bar = 29 psi).
- Normal operation: At startup, oil pressure will be high (between 4 and 5 bar); as the oil heats up, the pressure will usually drop at idle to around 3 bar.
- If you suspect an oil pressure problem, be sure to use a mechanical oil pressure gauge on the engine to verify your suspicion.
- The sender for this gauge is located on the left side of the cylinder head.
- Part #155-919-551
°Cels Gauge

- Displays oil temperature in degrees Celsius.
- Normal operating temperature range is between 100°C and 120°C (212°-248°F).
- The sender for this gauge is located on top of the oil filter flange.
- Part #321-919-541A
Coolant Temperature Gauge

This gauge displays water/coolant temperature. If a problem is sensed by the warning system, the red light will flash.
The sender for this gauge is mounted in the upper radiator hose flange on the cylinder head.
1990+: The warning light is also tied into a level sensor mounted to the coolant reservoir.
Normal Reading
The needle should be around or on the light under normal operating conditions. In stop-and-go traffic, drive-thru lanes, etc., needle may climb higher (this is due to little air flow through the radiator). Usual gauge operation: needle climbs to the right edge of the light, fan turns on, needle drops to left edge of light, repeat. While cruising, the needle generally stays over/on the light.
What temperature corresponds to the needle reading?
Very good question! It all depends on what thermo switch is installed in your radiator and which thermostat is installed. The standard, OEM thermo switch is a 95-84° switch. This means, for single- and two- speed fans, the radiator cooling fan will turn on at 95°C (203°F) and run until the coolant temperature in the radiator is down to 84°C (183°C). So, if you have the standard thermo switch in the radiator, when the needle reaches its highest point on the gauge and the fan turns on, the needle is showing a coolant temperature of approximately 95°C (203°F); with the needle directly over the light, the coolant temperature is approximately 87°C (190°F ~ I say "approximate" because, as stated elsewhere, these gauges are not 100% accurate), which is the temperature when the standard-temp thermostat opens.
![]() Needle Pegs to the Right and the Light Flashes
Needle Pegs to the Right and the Light Flashes
If the needle pegs to the right and the light flashes at start-up and remains this way, test the coolant temperature gauge sender as it may be faulty (disconnect the connector; if the light stops flashing and the needle drops, the sender is faulty).
![]() Gauge Reads Low (Needle Stays to the Left)
Gauge Reads Low (Needle Stays to the Left)
If coolant gauge is reading low even after the engine is warmed up, it's indicating that the thermostat and/or the gauge sender is most likely faulty. Test the gauge sender (K-Jetronic -- disconnect the connector and ground it; Digifant --disonnect the electrical connector and jump the yellow/red wire and brown wire terminals); if the needle moves upward when you turn the ignition key to battery-on position, the sender is faulty. (Digifant: If needle doesn't move, jump the yellow/red wire terminal to ground; if needle moves upwards, your brown ground wire is no longer connected to its ground point and requires repairing).
![]() Gauge Doesn't Work
Gauge Doesn't Work
First, test the gauge. If the coolant temperature gauge is not working properly along with the fuel gauge, and/or there are other elctrical issues with the instrument cluster, test the voltage stabilizer. For more voltage stabilizer information, see below.
![]() Warning Light is Flashing
Warning Light is Flashing
Possible issues:
- Coolant level is low
- Coolant is leaking
- Coolant is getting too hot
- Temperature sending unit is faulty
- Coolant level sensor is faulty
Possible causes:
- Burst hose(s)
- Cracked hose(s)
- Loose hose clamp(s)
- Clogged/restricted hose(s)
- Faulty thermostat
- Faulty coolant reservoir (or radiator) cap
- Clogged/leaking radiator
- Faulty coolant/water pump
- Air in the cooling system
- Air pocket around the level sensor (1990-1993)
- Incorrect ignition and/or valve timing
- Electric cooling fan not switching on
If all of the preceding are found to be okay, the temperature gauge sending unit and/or level sensor (1990+) and/or the gauge itself could be faulty. Please refer to the cooling system and/or electrical page for further information.
Fuel Gauge

There were multiple fuel gauge sending units used in these cars, all of which are now NLA (no longer available new). Tap here for additional fuel gauge sender information. The sending unit can be accessed by removing the rear seat, followed by the round cover.
![]() Fuel gauge doesn't work
Fuel gauge doesn't work
Please tap here for troubleshooting and testing the gauge.
Note: Check the sender float.
Instrument Cluster
The warning lights are pre-indicators of possible issues. Failure to heed the gauges' warning signs will result in blinking warning lights, which could lead to costly engine repairs. While the problem could very well be as simple as a faulty gauge sender, it's better to rule out the simple things than to be stranded on a deserted highway with, worst case scenario, a blown engine. The dash warning lights should all light at start-up and go out within a few seconds; if any or all remain lit, there's a problem (electrical and/or mechanical) that needs to be addressed.
Instrument cluster diagram guide: 
 Turn Indicator Light
Flashing = turn indicator is on. Also flashes in sync with hazard switch light when 4-way flashers are activated.
![]() Indicator light does not flash
Indicator light does not flash
Fault in the indicator circuit. First, check fuses #4 and #19 (1980-1982: #6 and #8). Usually, one or both fuses have blown. If a fuse is blown, replace it. The indicators should now work; if not, re-check the fuses. If the fuse has blown out again, there may be a faulty ground somewhere in the turn signal circuit. If the fuses are fine, check the hazard switch (turn signals are wired through the hazard switch) and replace if necessary. If all of the above doesn't fix the problem, check relay 12 (1980-1982: relay 9?) and replace if necessary. Also check for bad ground wires and/or connections in each circuit.
![]() Indicator light blinks fast
Indicator light blinks fast
This issue is mainly caused by a bad bulb. Check all turn signal bulbs and replace as need be.
![]() Indicator glows steadily
Indicator glows steadily
Usually indicates a ground issue somewhere in the circuit.
 Battery/Alternator Light
Indicates a problem with the charging system.
![]() Light is on at start-up, goes out when I start driving
Light is on at start-up, goes out when I start driving
This is normal. Current from the battery to the alternator is routed through the charging system warning light in the instrument cluster via a blue exciter wire. Once the alternator's output equals the battery's voltage, the warning light goes out, indicating that the alternator is now charging the battery (volt gauge jumps from 12 to 13-14). The point at which the light goes out varies between cars, but it's generally between 1100 and 1600 RPM. So, once the engine is started, blip the throttle.
![]() Light stays on while driving
Light stays on while driving
Faulty alternator, faulty voltage regulator, loose/broken V-belt, alternator exciter diodes burned out, broken/loose/corroded battery cables.
![]() Light stays off with ignition on
Light stays off with ignition on
Discharged battery, indicator bulb is burned out, no voltage due to faulty wiring/connectors, alternator not properly grounded, poor instrument cluster ground connection, faulty voltage regulator (alternator, instrument cluster). Please refer to your repair manual for further diagnostics/repair information.
![]() Light glows with ignition and engine off
Light glows with ignition and engine off
Faulty alternator diodes and/or short in the wiring.
 Oxygen Sensor (or EGR) Light
Indicates that it's time for an oxygen sensor replacement (every 30,000 miles); 1988+ Cabriolets do not have this warning light (sensor replacement interval is 60,000 miles). 1980 Cabriolets have EGR lights indicating it's time for an EGR valve replacement.
To turn the light off, carefully press the white (or red) button on the mileage counter box (black box located behind the coolant reservoir and attached to the firewall) all the way in using a pen or similar tool.
![]() This warning light is based solely on mileage; it is in no way connected to the oxygen sensor!
This warning light is based solely on mileage; it is in no way connected to the oxygen sensor!
![]() This warning light also triggers the charging (battery) light to come on - the two are tied into the same circuit.
This warning light also triggers the charging (battery) light to come on - the two are tied into the same circuit.
 Catalytic Converter Light
 ![]()
Indicates that the catalytic converter is overheating (temperature is above 870° C). This can be caused by a leaking exhaust valve, malfunctioning oxygen sensor, excess unburned gas in the combustion chamber, and/or a plugged catalytic converter. A faulty sensor and/or wiring can also cause this warning light to illuminate.
This warning light was/is required in Japan. The catalytic converter has an exhaust gas temperature (EGT) sensor mounted to its bung.
If the car is no longer in Japan and you wish to disable the warning light: Cut the sensor's wires, splice the wires together using a ring terminal, and mount the ring terminal to the nearest ground location.
 Oil Pressure Light
Indicates that engine oil pressure is too low & is usually accompanied by a buzzer.
![]() Oil light flashes at idle, oil level is fine
Oil light flashes at idle, oil level is fine
More than likely, the problem lies with incorrect oil weight, incorrect oil filter type, faulty 0.3 bar oil pressure switch/sender, and/or faulty wiring. Tap here for further information on the warning system and how to test it.
![]() Oil light flashes & buzzer goes off, oil pressure is fine
Oil light flashes & buzzer goes off, oil pressure is fine
More than likely, the problem lies with a faulty oil pressure switch/sender.
- Test the high-pressure switch on the oil filter flange by raising the engine rpm up to over 2000. Remove the blue-black wire from the switch and connect it to ground. If the buzzer stops buzzing and/or if the warning light stops blinking, the switch is faulty and should be replaced. The 1.8 bar pressure switch is normally closed, completing the path to ground. If the oil pressure is insufficient the switch will open, breaking the path to ground sending a signal to the low pressure warning system (a switch that is stuck open will cause a continuously blinking light and/or warning buzzer).
- Test the low-pressure switch on the cylinder head by removing the yellow wire with the engine running. If the warning light stops flashing, the switch is faulty and should be replaced. The 0.3 bar switch is normally open when the engine is running. If the oil pressure is insufficient the switch closes, completing the path to ground sending a signal to the warning light (a switch that is stuck closed will cause a continuously blinking light).
 High Beam Light
Indicates high beam lights are on.
 Upshift Indicator Light
Manual transmission only, up to '87. For best fuel economy, shift to next higher gear when light comes on.
![]() Light is on continuously
Light is on continuously
Upshift/reverse light switch faulty, vacuum switch faulty, no RPM signal from coil.
![]() Light does not come on
Light does not come on
LED or cluster connection faulty, upshift/reverse light switch faulty, vacuum switch faulty, faulty wiring/connections, control unit (relay) faulty.
See the electrical page for component locations.
 Airbag Warning Lights
Indicate that the airbag system needs servicing. When the lights are lit, the airbag system is inoperable. See the airbag page for further information.
 Check Engine Light
Digifant I Cabriolets only. These 1991-1993 Cabriolets were initially sold only in California. For further info, please see the Fuel System page.
When the check engine light is on it usually means that there is a fault in the emissions system. Performing an OBD I scan will a) tell you what the problem could be and b) clear the code(s) and turn the light out. The OBD I scan tool port is under the shift boot, towards the front (OBD II scan tools cannot be used to read OBD I codes unless they have an adapter). Tap here for a list of fault codes.
Making the Cluster Lights Brighter
Easiest way: Remove the instrument cluster, carefully open it up and remove the green film covering the lights.
More complicated, but very worthwhile: Remove the cluster, carefully open it up and replace the incandescent bulbs with LEDs. Want even illumination on your clock? Click here for a how-to.
How to Set The Clock
Using a sharp pencil, ballpoint pen, toothpick or pin, press the black "buttons" on either side of the clock at the bottom of the instrument cluster to advance the minutes and hour.
Want to change the clock to 24-hour? Tap here for a how-to.
Golf/Jetta II (Mk2) Instrument Clusters
Can they be installed in a Cabriolet? As a plug-and-play option, no. The second generation clusters, even in CE1 form, are different. Learn what they look like because they are being erroniously sold in Cabriolet forums/groups.
Can the clusters be made to fit? Yes, but you will need to do some modifications to make the clusters physically fit, and will need the matching wiring connector(s) with wires to splice into the Cabriolet harness.
Voltage Stabilizer
If the coolant temperature gauge is not working properly along with the fuel gauge, and/or there are other elctrical issues with the instrument cluster, test the voltage stabilizer.
Original stabilizer/regulator:

- Manufacturer: ITT Semiconductor
- Type: TCA700Y
- Housing: TO202
- Specs: 10V output, 220mA current limit, 100 mV load regulation
- Output tolerance: ±2%
- Max operating temp: 125°C
- Storage temp: -40°C to 125°C
- Pins: 1 (output), 2 (ground), 3 (input)
Replacement stabilizer/regulator:

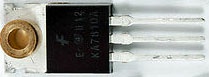
- Manufacturers: Fairchild (now ON) Semiconductor STMicroelectronics; Texas Instruments
- Type: KA7810AETU L78S10CV
- Housing: TO220-3
- Specs: 10V output, 250mA current limit, 100mV 200mV load regulation
- Output tolerance: ±2%
- Operating temp: 0° to 125°C
- Storage temp: -65°C to 150°C
- Pins: 1 (input), 2 (ground), 3 (output)
Replacement Voltage Stabilizers
The original TO202 stabilizer housing is obsolete; replacement housing is TO220. If your existing 10V stabilizer is faulty, replacements can be found through the following retailers:
North America ![]()
![]()
![]() :
:
- Mouser Electronics
- Part #511-L78S10CV
- Part #595-UA7810CKCS
- Digi-Key Electronics
- Part #497-6039-5-ND
UK/Europe: ![]()
![]()
- RS Components
- Part #686-9757
Worldwide ![]() :
:
- Volkswagen dealers and eBay; this option comes with the required metal spacer and longer screw (the eBay seller also includes an added heat-sink)
- Part #171919803
![]() Note: New voltage stabilizers are opposite from original (TO220 vs. TO202 housings, respectively); they will need to be flipped over, using a metal spacer and longer screw to install correctly.
Note: New voltage stabilizers are opposite from original (TO220 vs. TO202 housings, respectively); they will need to be flipped over, using a metal spacer and longer screw to install correctly.
Speedometer & Odometer
Speedometer Cable Part Numbers
Two-piece cable
- Lower cable:
- 171957809B (manual trans)
- 171957805B (auto trans)
- Upper cable:
- This cable is not available; convert to a one-piece version (see below)
One-piece cable
- LHD:
- 171957803D (manual trans; 1979-1981)
- 191957803D (manual trans; length: 1100mm)
- 171957803F (auto trans; length: 970mm)
- RHD:
- 172957803K (manual trans, 1982-1993)
- 172957803F (auto trans, 1979-1982)
For speedometer cable drive gear info, please see the Transmission page.
Replacing 2-piece Speedometer Cable with 1-piece Cable
Yes, the 2-piece cable can be replaced with a one-piece cable. For the early Cabriolets, be sure to double-check what type of connector your car has (clip-on or twist-on; 1979-1981 came with twist-on) before ordering a new cable. For the clip-on types, simply buy a one-piece cable for a 1988-1993 Cabriolet. It should be noted that the upper cable is no longer available; if you're needing to replace both cables, you will most likely need to convert to a one-piece cable.
What about the OXS counter box? The box is nothing more than a mileage counter. When replacing the 2-piece cable with a one-piece, the counter box is no longer useable. Therefore, simply unplug the box's electrical connector and toss the box into storage or a trash bin, or sell it.
![]() Speedometer Doesn't Work
Speedometer Doesn't Work
The cable has most likely become detached from the instrument cluster. For those cars with oxygen sensor counter boxes, the box and/or its attachment points could be faulty. Another possibility is that the cable's drive gear in the transmission has become faulty, or has gone missing.
If the above two issues cannot be resolved, you may need to source a working used unit. Or, send your speedometer to a qualified repair shop such as Hollywood Speedometer or Palo Alto Speedometer, both in California.
![]() The Speedomoter Bounces and/or Squeaks
The Speedomoter Bounces and/or Squeaks
It may simply need lubricating: Detach the cable from the instrument cluster and/or OXS counter box (attached to firewall, up to '87 models). Spray Tri-Flow or like lubricant onto the cable shaft; hold the cable upright for a minute and re-install (for 2-piece cables, lubricate both ends that mount to the OXS counter box). If this does not solve the problem, replacing the cable is most likely necessary.
![]() The Speedometer is Reading a Bit Faster Than Your Actual Speed
The Speedometer is Reading a Bit Faster Than Your Actual Speed
Replace the main ground cables and clean all other ground points. If that does not help, remove the speedometer and make sure there is enough spring tension on the needle. If the tension is lacking, carefully remove the needle, wind the spring, and replace the needle.
![]() The Speedometer is Reading Much Faster Than Your Actual Speed (ex. reads 60 when you're actually going 30)
The Speedometer is Reading Much Faster Than Your Actual Speed (ex. reads 60 when you're actually going 30)
The speedometer is broken and must be replaced. NOTE: Be sure to replace the battery ground cables first, making sure the contact points on the body and transmission are clean (1990+: also make sure that the Digifant ECU ground in the rain tray is clean and tight). If the car has poor grounds the electric current will seek a less-resistive path, which sometimes becomes the speedometer cable leading to the speedometer itself being destroyed internally.
What the Speedometer Number Means 
The number below the MPH or km/h on the speedometer side of the instrument cluster is the calibration of the speedometer to its transmission gearing (or: the number of revolutions required by the speedometer cable divided by 100 to travel a distance of 1/100th of a mile, which is 52 feet, 9.5 inches). Cabriolets use 1540 speedometers, whether it's a VDO or Motometer instrument cluster. USA speedometers are calibrated for 1000 RPMs at 60 MPH, while European speedometers are calibrated for 1000 RPMs at 100 km/h. Cabriolets (and their Scirocco counterparts) use European-calibrated speedometers. If your car has an instrument cluster from another model, simply divide 1540 by the calibration number on your car's instrument cluster to obtain the approximate speed difference percentage. For example, if your car has a 1707 speedometer, the formula would be: 1540 / 1707 = .90, which translates into your speedometer reading 10% slower than what it should be.
Odometer

What does the white number wheel indicate on the trip meter? Tenths of a mile/kilometer.
![]() Speedometer Works, But the Odometer Doesn't
Speedometer Works, But the Odometer Doesn't
The odometer gears are broken and/or out of alignment. Please see the DIY Guides menu for repair how-tos, or tap here to buy new gears.